What Is Aperture in Photography? (Add magic to your photography skills)
Aperture is one of the three pillars of photography. The other two elements are shutter speed and ISO. These three fundamentals settings are available on your camera. Which Plays a crucial role in capturing a better picture.
Understanding the concepts of aperture in photography can make you a creative photographer. It is deep but not as deep as you cannot dive into it. It adds value to your photography.
This article goes in a very subtle way. It will clear your basics of aperture in photography. Simple to understand and execute it in your practice. I have tried my level best not to leave any confusion behind. After reading the complete blog.
I have put all my experience, research, and study. To make it as easy as possible to understand the meaning of aperture in camera. The effects of it, how to take the best advantage of it. And every possible thing related to it.
Before we start, I would like to ask you a question?
Are you a beginner photographer
Or
A professional?
If a beginner well that’s all for you go read it.
If a professional, then it’s great that it means you know that “basic is the key to success”.
Back to basics will add more to your expertise.
Let us begin
What is Aperture in photography?
Aperture is the opening in the lens. Through which light passes to the image sensor. It’s that simple. Yes, it is, but let’s break it down and make it easier to clear the concept of aperture.
Your digital camera has two parts one is the camera body and the second is the lens. In DSLR and Mirrorless cameras it has interchangeable lenses. i.e the body and the lens. Whereas point and shoot, cameras have lenses attached to it. It’s attached and cannot be interchangeable.
Lens
There are blades in your lens called a diaphragm. So the opening of the diaphragm(blades) in the lens through which light passes to the camera is called the aperture. It is the first gate through which the light passes.
Camera body
The camera’s body has control of the aperture. That means the command is in the camera body that decides. How much light will pass through the lens? You can control the aperture from the camera body. You will find the aperture setting in the camera LCD or a dial button in the body.
So did you get what is the aperture in Photography?
Let’s combine all the above and make the best definition of aperture in your camera.
“Aperture is one of the essential pillars of photography. That allows how much light will pass through the lens to the image sensor. By opening or closing a diaphragm in the lens.”
F-number and F stop is Aperture
The aperture is measured as f-no. Or f-stop like f/1.4, f/1.8, f/2, and so on. It is often seen as f1.4, f1.8 without the slash. Both ways mean the same.
Smaller the f-stop number more the light will pass through the lens into the camera.Larger the f-stop number less light will pass through the lens into the camera.But here the beginners may get confused. Don’t worry, after practice, you will get used to it.
Smaller f-stop numbers are wide aperture or large aperture or high aperture. Larger f-stop numbers are small aperture or low aperture.
Smaller the f no. larger the aperture is and more light will enter.Larger the f no. smaller the aperture is and less light will enter.
Smaller the f no. More the diaphragm will open and more light will enter. Larger the f no. less the diaphragm will open and less light will enter.
I hope you have understood it with no confusion left. If not check out this image for more clarity.
The aperture is measured in the stop. Going from f1.2 to f1.4 is a stop. This is how it is called in the photography world. Increasing the aperture/ f stop is called opening up. Decreasing the aperture/f stop is called stopping down.
What will you do when someone will ask you to open up the aperture to its maximum? That means you have to keep the wider aperture available in the lens. And if someone will ask you to stop down the aperture to its maximum? Then you will decrease the aperture to its smallest no.
Why are apertures in photography measured in F1.2, f1.4, and so on?
The f-stop can be associated with any number like f1, f2, f3, f4. Why is the f-stop expressed as a particular no? i.e f1.4, f1.8, f2, f2.8, f5.6 and so on. It is because the f stop is calculated like this.
Image
When you open up from f1.8 to f1.4 the light gets doubled. And stopping down from f1.8 to f2 the lights get half.
Aperture setting in your camera
There are two ways you can control the aperture setting in your camera. They are manual mode and aperture priority mode.
Aperture Priority Mode is the semi-automatic mode. You set the f-stop according to your photographing needs. Where ISO and Shutter are controlled by the camera. To produce a properly exposed picture. This mode is displayed as “A” or “AV” that depends on company to company.
For beginners, it is the best way to explore photography and learn the concept of aperture. Where you don’t have to worry about the Shutter speed and ISO.
You can use the aperture priority mode in Wedding photography or landscape photography. Where your priority is to achieve shallow depth of field, sharper image, or wider depth of field. We will talk about these topics in detail in the coming section.
You will find a Dial meter with “AV” or “A” written on it. But I will suggest shifting to manual mode as soon as you can.
Manual mode is the setting where you have control over all the exposure triangle. Whereas, the other settings of camera is also controlled through manual mode.
You will get the aperture setting in the LCD. Before changing the f stop. You have to change the mode to manual. You will find that in the dial button with a sign “M”. You can also control f-stop from the dial buttons while looking in the viewfinder.
The soon you shift to manual mode the more you will develop your photography skills.
The quality of my photography changed when I shifted to manual mode. When I first held the DSLR. What do you expect from the beginner, I also started clicking on auto mode.
But in very less time I shifted to manual mode. And that was the situation where the real skill came out into the images. So, now as you have understood what is the aperture in photography. We will see how aperture affects your images?
Before we start there are few concepts that I will make clear. So that you can understand the effects with minimal effort.
Depth of Field in Photography
The depth of field is the concept of photography. Which means “the amount of area in focus “ from foreground to the background of the subject. The area in focus means the area of sharpness in the image.
The DOF can be wider, where every part of the image is in focus from the foreground to the background. Including the subject. The best example of a wider depth of field is architecture and landscape photography.Where sharpness is needed in the complete picture.
Whereas the narrow or shallow depth of field is where only the subject is in more focus. And the rest of the things are out of focus. Shallow means less visible or not sharp enough.
Shallow depth of fields makes the background blurry and that is the outcome of aperture. Which we will study in the effects of aperture.
DOF is also said to have a larger or smaller depth of field. Large when more area is in focus small when less area is in focus.
Effects of Aperture in Photography
Aperture outcomes have many effects in your photography. In this material, I will discuss the most common one. Which you will encounter in your every picture. They are
- Exposure
- Depth of Field
Let’s talk about each of them.
Exposure – How does aperture affect the exposure?
What is exposure to photography? The amount of light that makes the image brighter or darker. The image with more than required light is overexposed and the image with less light is underexposed. The images with adequate amounts of light are properly exposed.
As you have learned earlier in the chapter that aperture is the opening and closing the lens. The more the lens opens the more light will enter the camera. Vice-Versa with less light.
So, now you know that aperture controls the light i.e the exposure. When more light enters your photographs can be overexposed. And with less light, it can be underexposed.
Now controlling the light in accordance to produce a well-exposed image. That can be achieved by applying the required f-stop. And you can also compensate with the shutter speed and ISO. It depends on the need, situation, and type of photography.
To get used to these concepts. You have to work on your photography skills. That can be learned with practice and hard work.
Now let’s see how aperture affects the depth of field?
Depth Of Field – How does Aperture affect the depth of field?
Do you know what is the depth of field? As we have discussed it earlier. Now let’s see how aperture affects it. Larger the aperture narrower will be the Depth of Field. Smaller the aperture wider will be the depth of field.
When the aperture is high the background and foreground will be less in focus. Which will look blur and the subject will be in focus.
When you open up the aperture there is less DOF. When you start stopping down the aperture the DOF gets wider. It means more things are in focus. Everything in the images is sharper from background to foreground.
The fastest aperture(Large aperture) leads to less DOF. It can even out of focus some parts of your subjects. For example, taking a portrait with f.1.4. The focus is on the model of eyes and faces. The aperture is so fast that there will be very less depth of field. Even a few portions of models’ hair and face will be blurred.
The lens with higher aperture is often called a fast lens. Because it allows more light to come in.
Background blur- How to create background blur in photography?
Background and foreground blur is the effect of the aperture. The narrow depth of field creates the foreground and background blur. The shallow depth of field is the background blur.
Now the question is how to create a shallow depth of field? It means blurring the background.
You need to consider a fast lens and open up the maximum aperture and try to be as close to the subject. You will see the blur background with the subject in focus. If in case the subject is also getting out of focus. You can stop down the aperture until you get a sharper subject and blurred background.
Shallow depth of field is generally used by the photographer to avoid the unwanted things in the images. So that the subject gets direct attention. That can be achieved by blurring the background
You will see these effects in portraits and wildlife photography. Where you want the focus to be on the model and the animals. And blurring the background.
On the way to create a blurred background, you may get the overexposed picture. In that case, you have to play with the other two elements of the exposure triangle. That is shutter speed and ISO. You have to compensate with these to get adequate exposure.
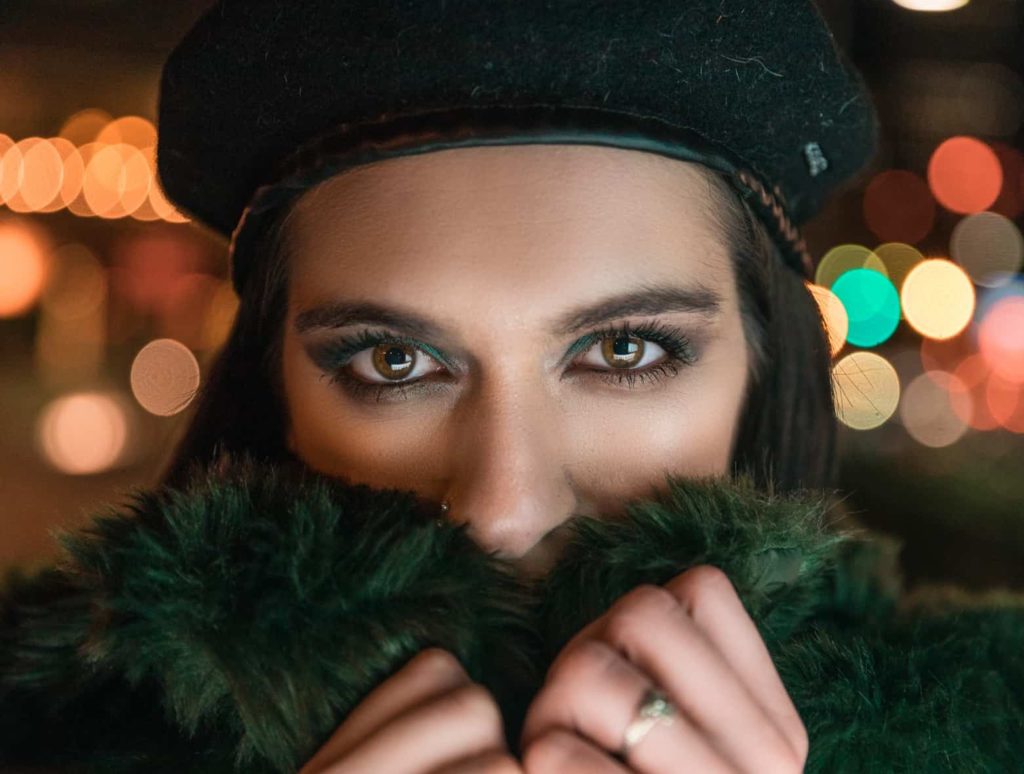
Bokeh- How to create bokeh in photography?
Bokeh means blur. The type of background blur is bokeh in photography. It is also the different qualities in the background blur. How is it created? As you know aperture creates background blur. So does with bokeh.
When you capture a shallow depth of field and there are spotlights, in the background. It will form a bokeh. It is a circle or diamond shape of blur lights. The shape of the bokeh depends on the shape of the aperture blades.
If the aperture blades is in a circle shape it will create circle bokeh. If it is heart shape it will form, heart shape bokeh. It is creative photography. Which makes the pictures look unique. Where the focus is on the subject. And unwanted things are blurred and the bokeh looks amazing.
The wider the aperture the more bokeh will be created. The smaller the aperture the less bokeh will be created.
Let’s see how you can create a bokeh?
Take your camera with a fast lens like f.14, f.1.8, f2, f2.8. The best you can do is take 50mm with f1.4 or f1.8. Both will work. Find a location with a spotlight in the background. Place your subject nearer to your camera and put the spotlight in the background.
Open up the maximum aperture f1.4 and compensate shutter speed and ISO for proper exposure. You will see the bokeh in the image.
There are more ways you can create a bokeh for unique photography. There are many tricks and techniques in photography. Which will make you a creative photographer.
Now, you know what are the effects of aperture. You will usually see in your images. Exposure, depth of field, background blur, and Bokeh. There are many more effects which I will discuss further in this blog. You will find more creative ways. Keep reading.
Aperture in different types of photography and Situations
We have discussed the effects of aperture in photography. Those effects may vary and it depends on the type of photography you are doing and the situations. Here we will discuss what will be the effects in a particular condition.
And what will be the best aperture for this type of photography?
- Best aperture for portrait photography?
- Best Aperture for Landscape Photography?
- Best Aperture of Wildlife Photography?
- Best aperture for wedding photography?
- Best Aperture for Night Photography?
- Best Aperture for Daylight Photography?
Best Aperture for portraits photography
For portraits, the main focus is on the subject’s face. So now let me ask you, what will be the aperture and how will you click this picture?
As you want the focus on the face, make the background blur. For that, you need to take a fast lens, f1.4, f1.8, f2, or f2.8. These are fast lenses and best for portrait photography. You can use 50mm f1.4 or 1.8 both will work. You can also use other lenses like 24-70mm, 85mm.
Get closure to your subject and open up the maximum aperture. Then compensate with the shutter speed and ISO for proper exposure. If in case the maximum aperture is blurring your background as well as the model’s face. Then stop down the aperture until you get the perfect picture.
So the best aperture for portraits photography will be F1.4, f1.8, f2, f2.8. You may find these lenses expensive. You can use f5.6 also but make sure you are close enough to the subject. And controlling the exposure triangle to its best.
The best lens, in this case, will be 50mm f1.8, it is reasonable to buy and has a magical response. A 50mm f1.4 is an expensive lens.
Best aperture for Landscape photography
Landscape photography is something when you love to capture nature. The sky, land, rivers, hills, and whatever you see under the sky. In this type of photography, there are so many things to keep the focus on.
If you are clicking a landscape shot, you try to make more of the things visible in the frame. In this case, you have to keep a smaller aperture. The preferable aperture would be f11 to f16. It also depends upon the light condition.
In landscape, you will require a wider depth of field. Where most of the things will be in focus/sharp. As you know that one of the main effects of the aperture is the depth of field. So by understanding the aperture, you can click wonderful landscape pictures.
For landscape photography, you need a wide-angle lens. That can capture more in the frame. A lens like 35mm, 14mm, 18mm. Some variable lenses like 18-55mm, 24-70mm are good for landscape photography.
This type of picture is used for commercial purposes for, wall art, or publication etc. So it needs to be sharp enough to get visible.
Best aperture for wildlife Photography
Aperture plays a crucial role in wildlife photography. The subjects are the animals and you have to keep it in focus. There are a few things you have to keep into consideration. while doing wildlife photography.
What is the light condition? Because the light is not moderate, it keeps on changing as the subjects keep on moving.
The subject is moving frequently or is sitting ideal. But rarely you will find animals sitting ideal. Keep the shutter speed according to that. To freeze the fast-moving animals you have to increase the shutter speed.
For low light situations, you need fast aperture and in wildlife, the focus is on the animals. So you will need less depth of field. To create a shallow depth of field you will need wide aperture only.
The fastest aperture would be the best for such a type of photography. You required a telephoto lens for it. It is the zoom lens so that you can see the animals from far away. The maximum aperture in a telephoto lens is f2.8.
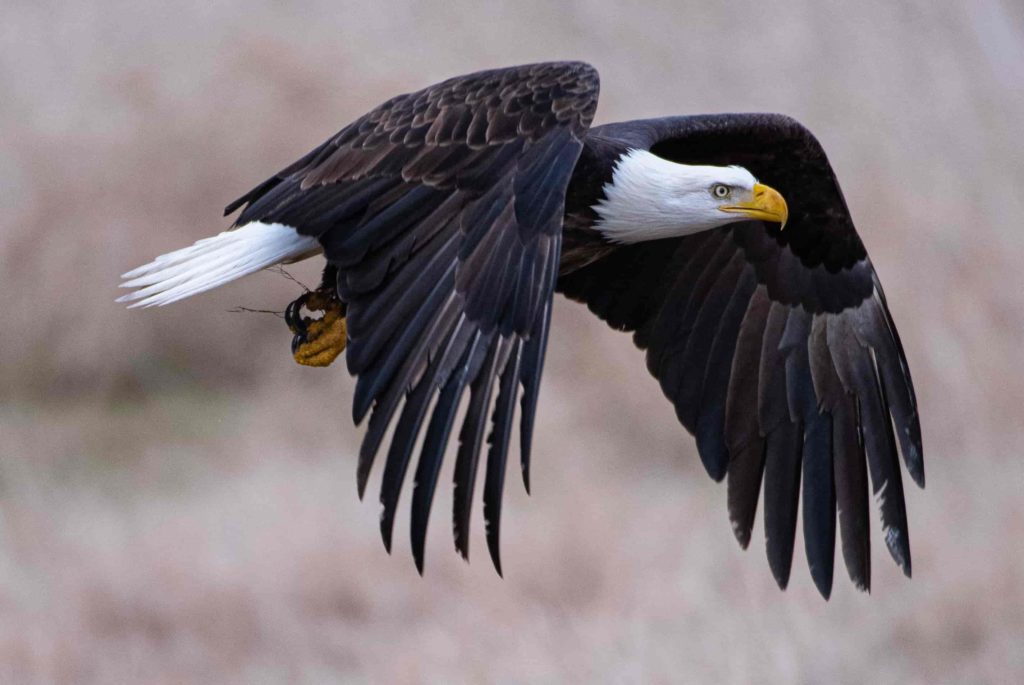
As the focal length of the lens is large in telephoto lenses. It gets easier to create a blurred background and keep the focus on the subject.
To create a blurred background select the wide aperture in your lens. Then compensate with the shutter speed and ISO. Make sure that the subject is getting frozen. If not, increase the shutter speed and compensate with the ISO for proper exposure.
When you are taking Macro wildlife photography. You have to take care of the sharpness of the subjects. In this case, select an in-between aperture like f5.6 or f6. So that the subject will be properly focused.
Best Aperture for Wedding Photography
In wedding photography the light condition is unpredictable. In most cases, wedding photographers have to deal with low light situations. For low light situations, a wide aperture lens is the best lens.
A large aperture lens will help to perform well in low light conditions. It will also help in taking candid and creative shots. Candid wedding photography is in major demand these days.
So the best aperture for wedding photography would be f2, f2.8. As these lenses perform well in low light situations and also it will help you to capture candid shots.

The best lens for wedding photography is 24-70mm f.2.8-5.6. 24-70m, 24-104mm, 85mm, and 50mm. It doesn’t mean you cannot click with some other lenses. It depends on the situation and the photographer.
It is a type of photography where you have to capture the moments within a second. Once it’s gone you cannot repeat it. The subject is moving and the lighting condition is unpredictable.
For candid wedding photography use 70-200mm f2.8-5.6. As it is a telephoto lens you can click the subject from far away without disturbing the subjects. And that way you can take candid shots.
As it has f2.8 it will work well in low light situations. But while zooming in the max aperture will be f5.6. You may not get adequate light in this aperture. So you have to compensate for the ISO. As shutter speed mostly will be high. Because the subjects are mostly in motion.
Best Aperture for Night Photography
Night photography means low light situations. Where there are no natural lights. For such conditions, fast aperture plays a crucial role. As more light passes into the sensor.
Night photography can be an outdoor shoot and an indoor. The event like music and night club etc. These places you may find artificial lights available. But often you have to carry your flashlights. There are extreme low light situations.
The aperture for night photography depends on the lighting situation. Start with the wider aperture and compensate for the correct exposure.
The best lenses for the night photography world are f1.4, f1.8, f2, or f2.8. These all are fast lenses and work amazing in low light situations.
Best Aperture for Daylight Photography
Daylight photography means when you are taking outdoor shoots in daylight. Thus in daylight, you will get enough light. You need not keep a wider aperture for more light. You can keep a smaller aperture.
Now your needs will decide what aperture to keep for the shoot. If you’re taking portraits use a wide aperture and compensate it with the other two elements.
If you are doing landscape photography use a small aperture somewhere between f11 to f16. For architecture photography, you need a small aperture to keep everything in focus. Use f11 to f16 and keep stopping down until you achieve the desired image.
For landscape and real estate photography use a wide-angle lens.
Now as you know the aperture setting in different types of photography situations. You can try this of your own.
Remember “Practice is the Key”
Now let’s see some other types of aperture effects in photography.
Fixed lens and a Zoom lens
There are two types of lenses and we will see how they affect the aperture in photography.
Fixed lens
The fixed lens also is known as “prime lens”, or “block lens”. You cannot zoom in and out in these lenses. That’s why prime lenses always have the fastest aperture. It can pass more light. Which is perfect for low light situations.
Prime lenses are the fastest lenses. You will always see that these lenses have a maximum aperture. Let it be 50mm f1.4, f1.8, 14mm, 35mm, or 24mm all these are prime lenses with fast aperture.
These lenses don’t have an image stabilization feature. Whereas a zoom lens has IS to stable your handshake.
There are faster apertures than f1.4, like f.95, f0.7 but these lenses are rarely used. It will work in a super low light condition.
Zoom lens
Zoom lens the word says it all. It is also called a variable lens or telephoto lens. These are the lenses that you can zoom in and out. In zoom lenses, you will not find the aperture as fast as a prime lens. You can change the focal length.
In zoom lenses, there are two maximum apertures. For example 70-200mm it is a zoom lens with the maximum aperture of f2.8-f5.6. It means when you shoot at 70mm focal length then you can select the fastest aperture i.e f2. Where when you zoom in to 200mm you cannot select the maximum aperture of f2.8, now the maximum aperture will be f5.6.
Variable lenses have their quality. You can change the focal length in the available parameter. The telephoto zoom lens has an amazing capability to see far away subjects. Which is often used in wildlife photography.
And the lenses with the fast aperture in zoom lenses are very expensive as you get more light capacity and can zoom in.
Most of the zoom lenses are not expensive. The telephoto zoom lens used for far away subjects. Which is Used in wildlife photography is expensive like 600mm and 400mm etc.
The few examples of variable lenses are 18-55mm, 18-135mm, 24-70mm, 24-105mm, 70-200mm, and 600mm, etc.
Other effects of Aperture in Images
There are many more ways the aperture affects your picture. People often used it as a creative photograph. Let’s see.
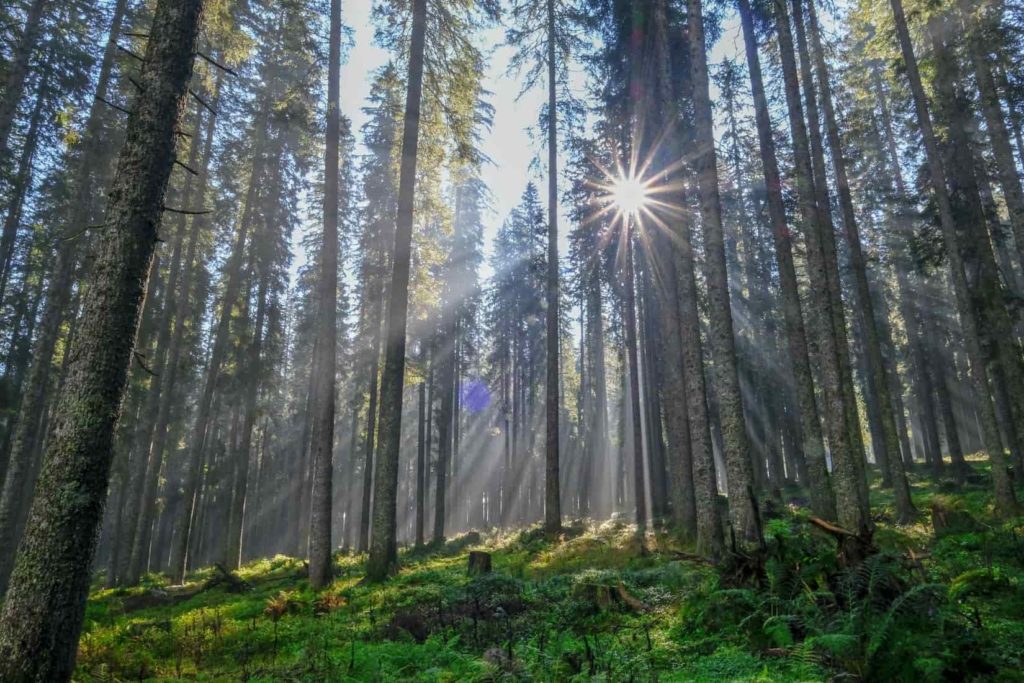
Starburst Effects
Starburst effects also called Sunstar. This is the small beam of light that is partially hidden with the tree or any obstacle. Which creates a beautiful sparkle star effect. You can see these effects in landscape photography.
When for the first time I saw these effects in my image. I was so excited about this amazing click. Though at that time I wasn’t knowing about this effect and its name.
To achieve the best starburst in photography. You can select the small aperture and say f16 will be the best. Take a wider landscape shot and make sure there is a small amount of sunlight hidden in the tree.
You will get a creative shot. If you miss it in your first attempt. Then change your perspective/angle. Also, make sure you are compensating with the shutter speed and ISO for proper exposure.
But how does aperture create the sunbeam to form a starburst?
The aperture blade plays a role in this situation. If the blade is 6 you will see 6 sunbeams in the starburst. If the aperture blade is 8 you will see 8 sunbeams, if it is 7 you will see 14 sunbeam effects.
Oh hold on,
Why is it that 6 produce 6 beams and 7 produce 14. Is there any typing error?
No, it’s not an error this is how it happens. Let me explain to you the mechanics behind it.
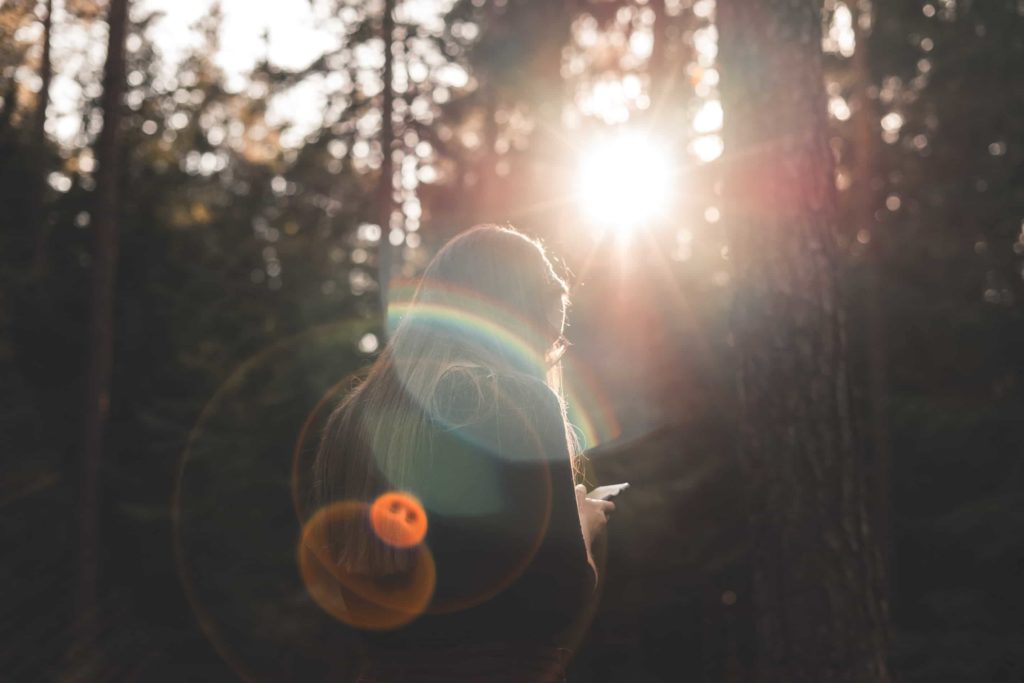
Lens Flare
Lens flare is also an effect of aperture. When you click pictures in the light when the light is direct to the camera lens. You may see some kind of circle light spots. These are the flares and you can utilise it as creative photography.
Focus shift Problems
Let me tell you what is focus shit? You can say it is a type of error in the lens. When you stop down the aperture you will notice the focus point changes from one place to another. Let see why and when it happens?
Keep the lens in manual focus. Pick a subject, zoom in, and click a picture. You can start with f2.8 and then stop down the aperture. Keep stopping down and click pictures each time.
During the process don’t change the focus point at all. And for best results use a tripod.
After clicking the picture you will see while stopping down the aperture. The focus point has shifted from one place to another.
So you can see this is how aperture affects the focus shift from one place to another.
A focus shift generally happens because of the aperture blades. As when the aperture stops down the edge of the diaphragm allows less light to pass as compared to the middle of it.
How to get rid of the focus shift in photography?
Though this is not a major problem. As you can fix it while taking pictures. Here are a few things you can do.
- Once you stop down and find the focus shift. You can rotate the focus ring and fix it to the point. Though with a wider depth of field it won’t affect much.
- You can also use autofocus in such situation.
Conclusion
Now you have understood what an aperture is in photography? As you have gone through the entire article now it’s your turn to do practically. Go burn your ass to enhance your photography skills.
Aperture plays a crucial role in shaping a photographer. You should explore it to get better with it. If you are still left with any confusion feel free to contact me through mail or you can comment below. I reply to all the queries.
As you are into photography. You may love this profitable materials.