Rules are Made to Broke Until you Know it First
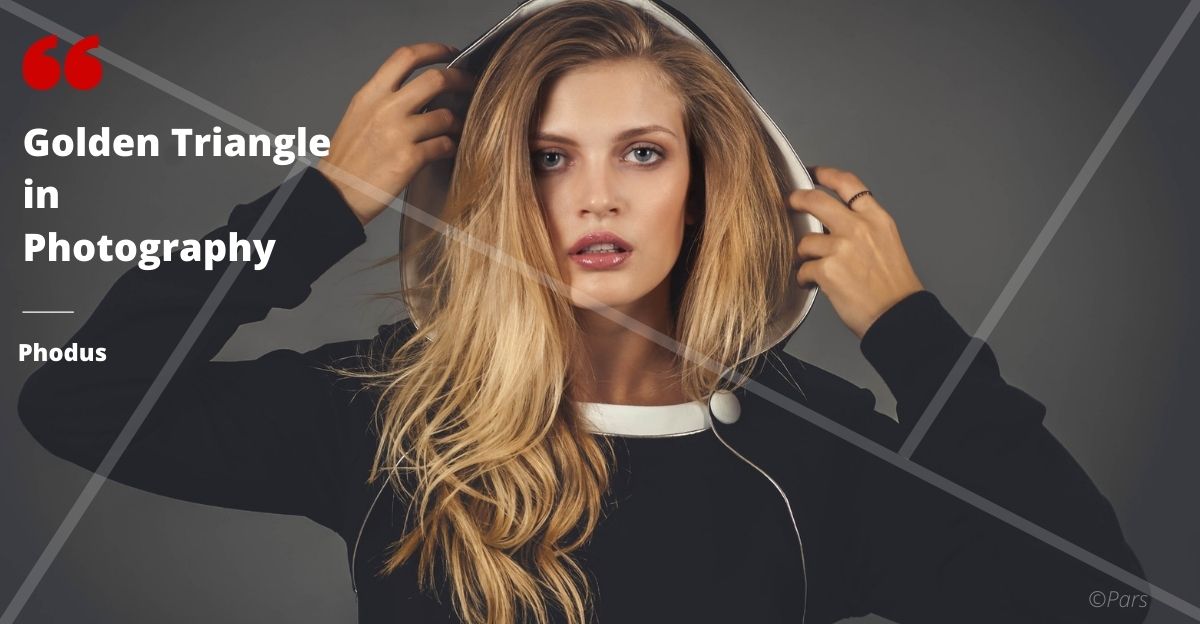
The Golden Triangle is one of the rules of composition in photography.
You can say, this is the advanced version of “Rule of thirds”. The most common rule you have come across.
It is not as difficult as it sounds. Once you start using these rules in your photography practice. It gets easy to understand and interpret.
Applying this in your images will make it look balanced and appealing.
Have you ever wondered? Why are professional pictures so appealing and meaning full?
It’s because they know the basics of photography and also know how to break it.
Here in this article, I have made it easy for you to understand the golden triangle composition in photography. And how can you use it in your photography life?
Let’s get started…
What is the Golden triangle composition in photography?
Golden triangle composition is a structure, a guideline to make a better composition of your frame. In photography, there are many rules of composition. Like the rule of thirds as discussed earlier.
These are the concepts to make your picture look more appealing to the viewers. It gives more dynamics sense to go deep into the picture.
You must have heard people say this image has a wonderful message.
It helps the picture to speak out. It helps to convey the message which you have for the viewers to receive.
In the rule of thirds, the frame is divided into three parts vertically and horizontally. But here in the golden triangle, you have to deal with the triangles.
It has more features to portrait your message in the images.
How Does the Golden Triangle Works?
The basic concept of the golden triangle is to draw imagery triangles in the frame. You create 4 triangles and in total it has 6 triangles.
As you know the camera frame is rectangular. When framing your scene, consider that rectangular frame in your mind.
Now draw a diagonal line from the bottom left corner to the top right. The next step is to take one of the empty corners( top left corner) and draw a line that touches the main diagonal line at a 90-degree angle. And interests it to the main diagonal line.
Again take the last empty corner(bottom right corner) and draw a perpendicular line that touches( intersect) the main diagonal line at 90 degrees. This is how the overall triangles will look.
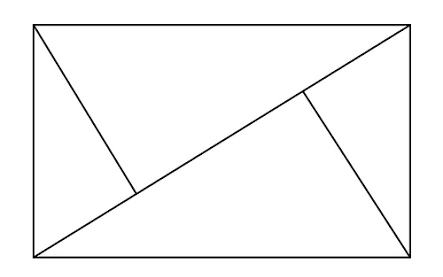
Once you are done with the framework. The intersection point will be the point of interest. It is the place where you will place the main subject or main focus of the subject. There are many ways to place your subject in this rule.
The following ways you can consider placing your subject in golden triangle composition.
- Place the subject on the main diagonal line
- Place the subjects on either two of the perpendicular line
- Place the point of interest on the intersection
- You can place the subject on any of the triangles
- You can consider all of these guidelines at once also
It looks complicated in writing but when it comes to practice it is similar to the rule of thirds. Just an upgraded version of it.
It’s not compulsory to adopt this rule but yes using it in your photography will add more value to it.
So in what types of photography, you can use this rule? And how to use it?
…let’s check out
How to use it for better results?
Now that you know what it is and how it functions? Let’s check out how to use it for getting the best result out of it.
Photography is all about your creativity. How much you put in to get the best result. It’s your way of doing things. But yes knowing and considering these rules add more eyes to your pictures.
So to develop your style first get practiced with these concepts. Then your inner photographer will come outside to mesmerize the world.
Here are a few tips to get a better result out of this rule:
- Look for a leading line along with the diagonal triangle
- Place the subject on the diagonals
- Place the subject inside the triangle
- Search for the triangle in the frame
- Point your subject at the intersection point
- Check the golden triangle with another corner
- Use the negative space
Applying these points will make it easy for you to use it for better results. And yes your pictures will stand out from others.
Try incorporating these techniques in your photography and see the difference.
Yes, the question is will it work for any type of photography?
…Let’s have a look
How to use it in different types of photography?
The answer to your above question is. Yes, you can use this composition in any type of photography. There is no hard and fast rule. The key is to use it and practice it to get better with it.
Let’s talk about how to use it in different photography genres.
Golden triangle in wildlife photography
You need to be good at your photography skills to pursue wildlife photography. It’s the most adventurous and requires expensive equipment.
In this genre, the subject is not always available in front of your camera. You prepare yourself before starting to capture the wildlife. You set out your gadgets, plan your location, and look for the subject to arrive.
Keeping these points into mind the golden triangle rule might get difficult to apply. So as I said earlier it requires a high level of skill. You just need more practice to freeze the animals lining them into the triangles.
You can look for a leading line of the birds or the animals or the trees to make your pictures look wonderful.
You can position the subject inside the triangle. You can also keep the point of interest in the intersection point of the diagonal.
You can also use the negative space along with considering other rules of the composition.
So these are the ways you can use it in wildlife photography.
Golden triangle in food photography
In food photography, you have the subject in front of you. You can use all the features of the golden triangle to capture a perfect photographic composition.
Place the ingredients in a leading line to the main point of interest( the main dish). You can also place all the subjects on the triangle.
You can also place the point of interest in the intersection point and also utilize the negative space to create a dynamic composition.
Golden triangle in portrait photography
For portraits shoots try to use the concepts with the full features of the model. Like placing the leg on the main diagonal and the hands-on the leading lines. You can also place the model body in one of the triangles.
But when you capture close up portraits. you can use this rule by placing the point of interest in the intersection of the diagonal. That is the eye of the model.
Try this it will make your picture look outstanding
Golden triangle in landscape photography
Most of the time you can find people applying golden triangle rules in landscape and architecture photography. It is because you get to find the leading lines which create a dynamic picture. It gives a movement in the photographs.
For example, capturing a river flows in one direction towards the mountain. You can use the river as leading lines and the mountains as the triangle or put along the diagonal.
It also works pretty well in capturing the landscape with roads that lead towards the main subject and give a sense of movement. It creates a dynamic composition. When the viewers look into the picture there is more to see in it. As the leading lines will grow to some path.
Rule of thirds vs Golden triangle
The rule of thirds is the basic rule of composition and it is easy to implement. Whereas the golden triangle is an updated version of it. And requires more practice to use it in the daily shoot. The rule of thirds deals with the rectangular whereas the golden triangle deals with triangles.
You can use both the rules at a time. And one doesn’t need to be better than the other but yes golden triangle has more ways to execute it.
If you are good at one try implementing the other one and feel the difference in your photography.
Conclusion
So now that you know everything about the golden triangle composition in photography. It is time to go to practice. This is not rocket science or a formula. You can break the rules but before breaking it. Try to learn about it first.
Experts break the rules but before that, they get strong with the rules. First, learn it. Once you get hands on it. Just use your creativity and break the rules.
If you still have anything in your mind. Feel free to comment below. I reply to all of it personally.
FAQ
Why use the golden triangle composition in photography?
It gives a more dynamic composition to the picture. It gives a sense of movement in the pictures. It makes your picture look more appealing. The leading lines lead to the main subject.
It helps in conveying the message portraits by the photographer. Simply, composition rules are made to provide guidelines. To make the pictures look more balanced and natural.
It creates a balanced picture that catches the viewer’s eyes.
Is it compulsory to use it?
No, it is not at all compulsory. It’s up to you but implementing it will save your time and produce a balanced picture.
Is it a photography rule?
No, it’s not a rule exactly. It’s a guideline to create better photography.